
Why You Should Build a “Link in Bio” Page on Squarespace (Instead of Using Linktree)
If you’ve ever tried to cram your entire business into that single Instagram link, you know the struggle. Most people default to Linktree or other third-party bio link tools — but if you’re already paying for a Squarespace site, you can easily build a branded, trackable version of your own. It takes about fifteen minutes, costs nothing extra, and looks infinitely more polished.
Let’s get specific.
1. Keep traffic where it belongs—with you.
Linktree and similar services host your links on their domain. That means every click goes to them first, not your website. By hosting your own bio link page, you keep all that lovely traffic data and SEO juice within your own ecosystem.
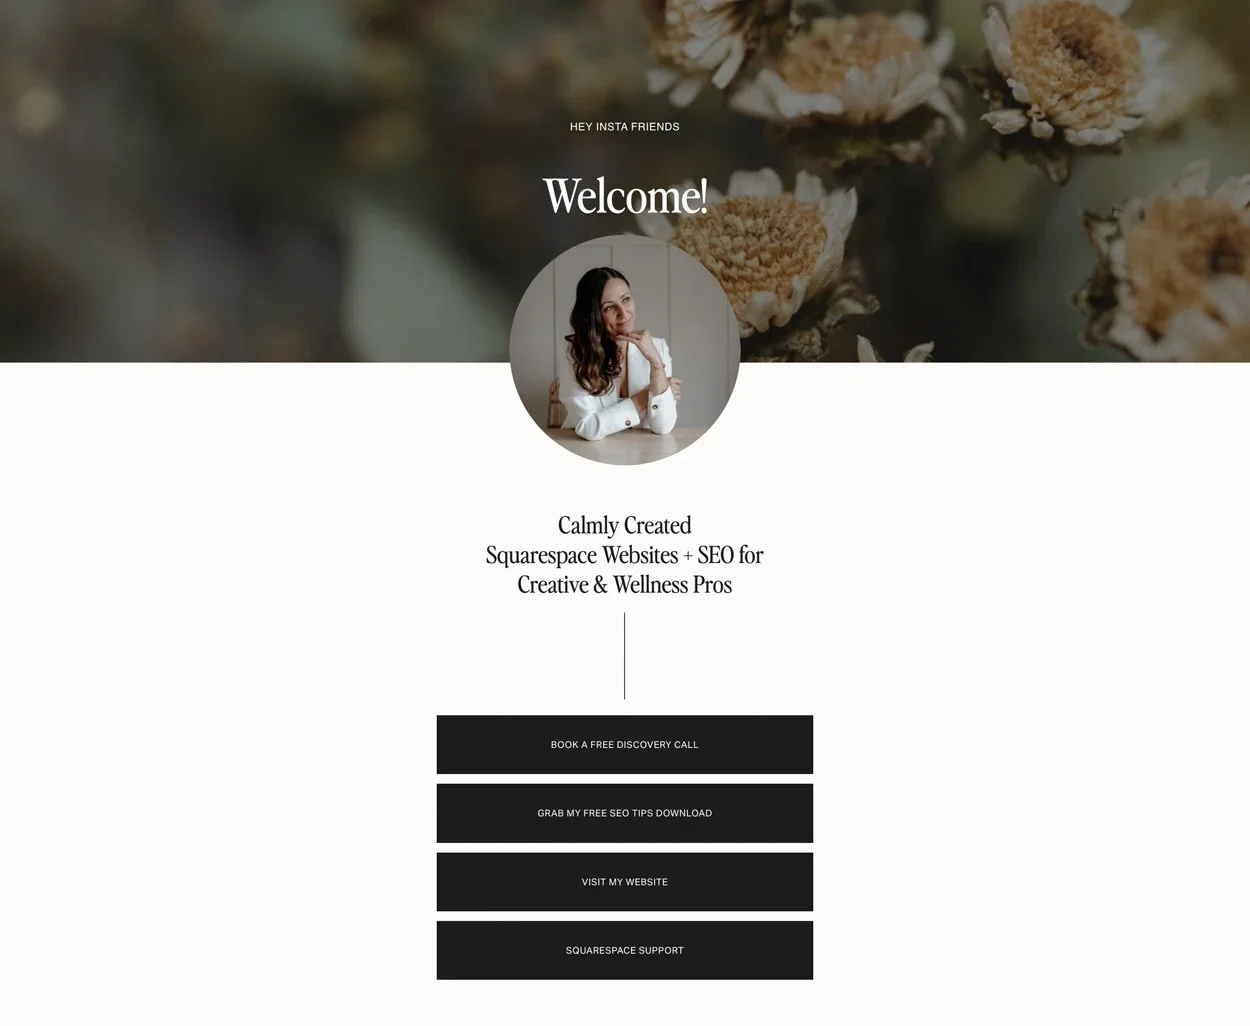
2. Full control over design.
On Squarespace, your link-in-bio page can look like you. Use your fonts, colours, button styles, and imagery… not whatever minimal theme Linktree lets you pick. You can even mirror your homepage for a cohesive brand experience.
3. Add extras that convert.
Unlike Linktree, you can include more than just buttons. Add a short bio, newsletter signup, a featured product or lead magnet, or even a “book a call” button. Every pixel can be purposeful.
4. Easier analytics and tracking.
Squarespace lets you view page visits, click-throughs, and referrers right from your Analytics tab. Or you can add a Google Analytics tag and measure performance in one dashboard, with no external accounts or upgrades required.
5. Simple to create (here’s how):
Step-by-step:
In your Squarespace dashboard, click Pages → + → Blank Page.
Name it something short like /links or /bio.
Add a text block for your intro or tagline.
Add a button block for each link you want ( website, shop, newsletter, course, etc.).
Add linked social icons, or you can include them in your buttons if you prefer.
Stack them vertically for a mobile-friendly layout.
Optionally, add your logo or a profile photo at the top.
In Design → Site Styles, match your brand fonts and colours.
Finally, grab the page URL and paste it into your Instagram bio. Done!
Bonus tip- it’s wise to remove your header and footer from this page.
In the main menu, click Pages ▸ Hover over the page you want to edit and click the gear icon (settings).▸ Go to the Navigation tab.▸ Toggle off “Show Header and Show Footer”▸ Click save.
It’s important that this page is created in the Not Linked section so that it can’t be clicked on from anywhere else within your website. Since you want people to access this page from Instagram or your other social platforms and will be designing it for that purpose, you don’t want to have it accessible on your website!
You might also want to consider turning the SEO features off for this page. Doing this will prevent it from showing up in Google search results so that people don’t land on your link-in-bio page.
In the main manu, click Pages▸ Hover over the page ▸ click the gear icon (settings) ▸ SEO tab ▸ Hide page from search results▸ turn off. ▸ Click save.
6. Keep it current!
Update your link-in-bio page seasonally—feature your newest post, most recent project, or latest offer. Unlike Linktree, it’s not a static template you set and forget; it’s a dynamic mini-hub that grows with your brand.
Building your own link-in-bio page is the smart move so you keep control, capture traffic, and ensure every interaction is a branded reflection of you.
Pro tip: Once it’s built, link to it everywhere—email signature, Pinterest, even your business card with a QR code.